Tailored to Your Needs
Request reports with exactly the data fields, filters, and format you need. Perfect for unique business requirements that standard reports don’t cover.
Custom Reports allow you to request specialized reports that aren’t available in the standard report library. Once created, you can view, filter, search, and download your custom reports from the Reports CSV page. Submit a detailed request describing what data you need, and the ShipEdge support team will create a custom report tailored to your specific business requirements.
Request reports with exactly the data fields, filters, and format you need. Perfect for unique business requirements that standard reports don’t cover.
Once created, custom reports can be scheduled to run automatically at your specified frequency (daily, weekly, monthly, etc.).
ShipEdge support team develops your custom report, ensuring it’s optimized and follows best practices for performance and accuracy.
Once created, custom reports appear in your reports list alongside standard reports, making them easy to access and generate.
Use powerful search filters to find reports by ID, date range, or name. Search across all fields with flexible matching options.
Download individual reports or select multiple reports for bulk download. Manage your report collection efficiently.
Access the Request Form
Navigate to SpecialReportstCsvlist.php?custom_reports=ok or click Custom Reports from the Reports page header (if available for your user level).
Fill Out Report Name
Enter a clear, descriptive name for your custom report in the Report Name field (required). Use a name that clearly identifies what the report contains, such as “Monthly Sales by Region” or “Inventory Turnover Analysis”.
Provide Description
In the Description field (required), provide detailed information about:
Specify Columns
In the Columns field (required), list all the data columns you want in the report. Be specific about:
Set Report Period
Select how often you want the report to run from the Report Period dropdown (required):
Choose Initial Date
Select the Initial Date (required) when you want the report to start running. Use the calendar picker to select a date.
Add Contact Information (Optional)
In the Contact Information field, provide:
Provide Email (Optional)
Enter your Email address if you want to receive notifications about the report request status or when the report is ready.
Submit Request
Click Submit to send your custom report request. The system saves your request and sends a notification email to the ShipEdge support team.
Wait for Confirmation
You’ll see a confirmation message: “Your request has been sent. We will contact you soon.” The ShipEdge team will review your request and contact you to discuss details or confirm when the report is ready.
help@shipedge.com) with your request detailsOnce your custom report is created:
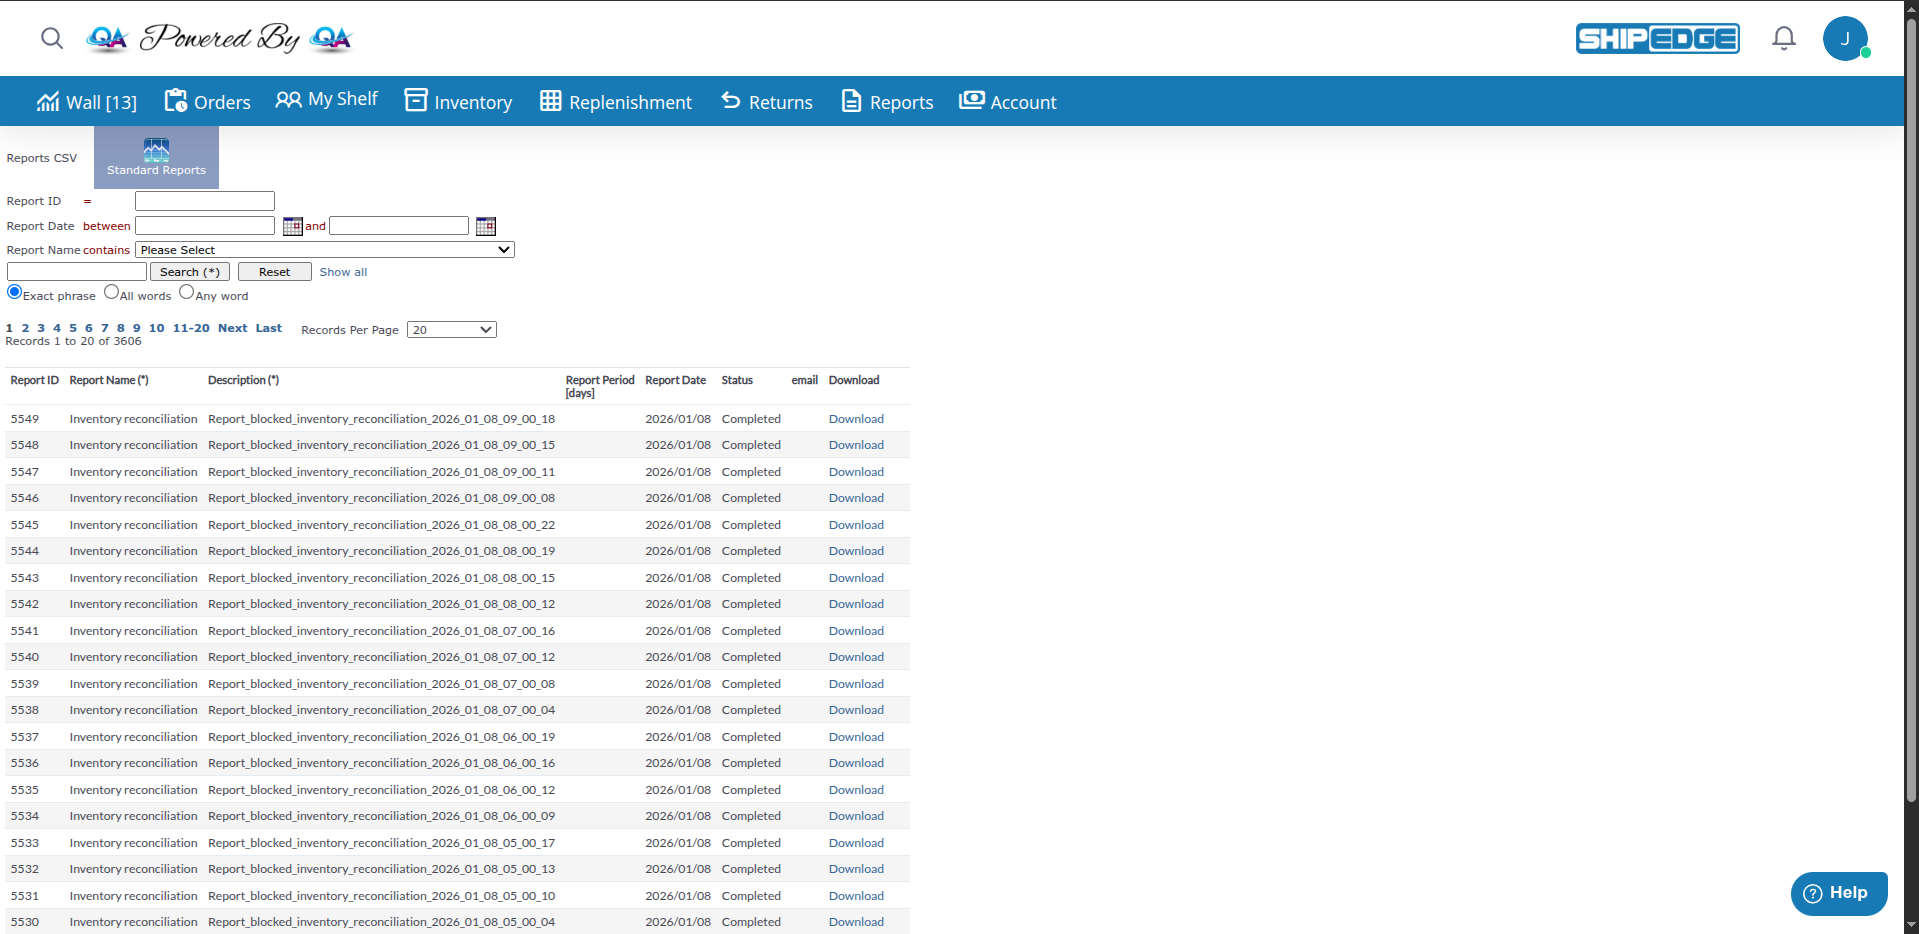
Once your custom reports are created, you can view and manage them from the Reports CSV page (SpecialReportstCsvlist.php). The page displays all your reports in a table with advanced filtering and search capabilities.
The reports table displays the following information:
Filter by Report ID
Enter a specific Report ID in the Report ID field and click Search (*) to find a specific report by its ID number.
Filter by Date Range
Use the Report Date between fields to filter reports by generation date:
Filter by Report Name
Select a report name from the Report Name contains dropdown menu. This shows all reports with that specific name, which is useful when you have multiple versions of the same report.
Use Basic Search
Enter keywords in the search field and choose your search type:
Apply Filters
Click Search (*) to apply your filters, Reset to clear all filters, or Show all to display all reports.
When you have many reports, use pagination to navigate through them:
When a report status is Completed, click the Download link in the Download column to download the CSV file.
When you filter reports by Report Name, you can download multiple reports at once:
Reports can have different statuses that determine available actions:
Provide as much detail as possible in your request. The more specific you are about columns, filters, and format, the faster the team can create your report.
Include why you need the report and how you’ll use it. This helps the team understand your requirements and suggest improvements.
If you know the exact database field names, use them. This reduces back-and-forth questions and speeds up development.
Choose a report period that matches your actual needs. Don’t request daily reports if weekly would suffice - it reduces system load and processing time.
Check if a standard report already meets your needs before requesting a custom report. Standard reports are available immediately and don’t require development time.
Custom reports take time to develop. Submit requests well in advance of when you need the report, especially for time-sensitive projects.
Custom Reports Option Not Visible
No Response After Submission
Report Not Available After Creation
standard_report_list.php or SpecialReportstCsvlist.php for your custom reportCannot Download Report
Filters Not Working
Report Doesn’t Match Requirements
Next Steps: