Automatic Recommendations
The system automatically recommends the best packaging for each order based on product dimensions.
Esta página aún no está disponible en tu idioma.
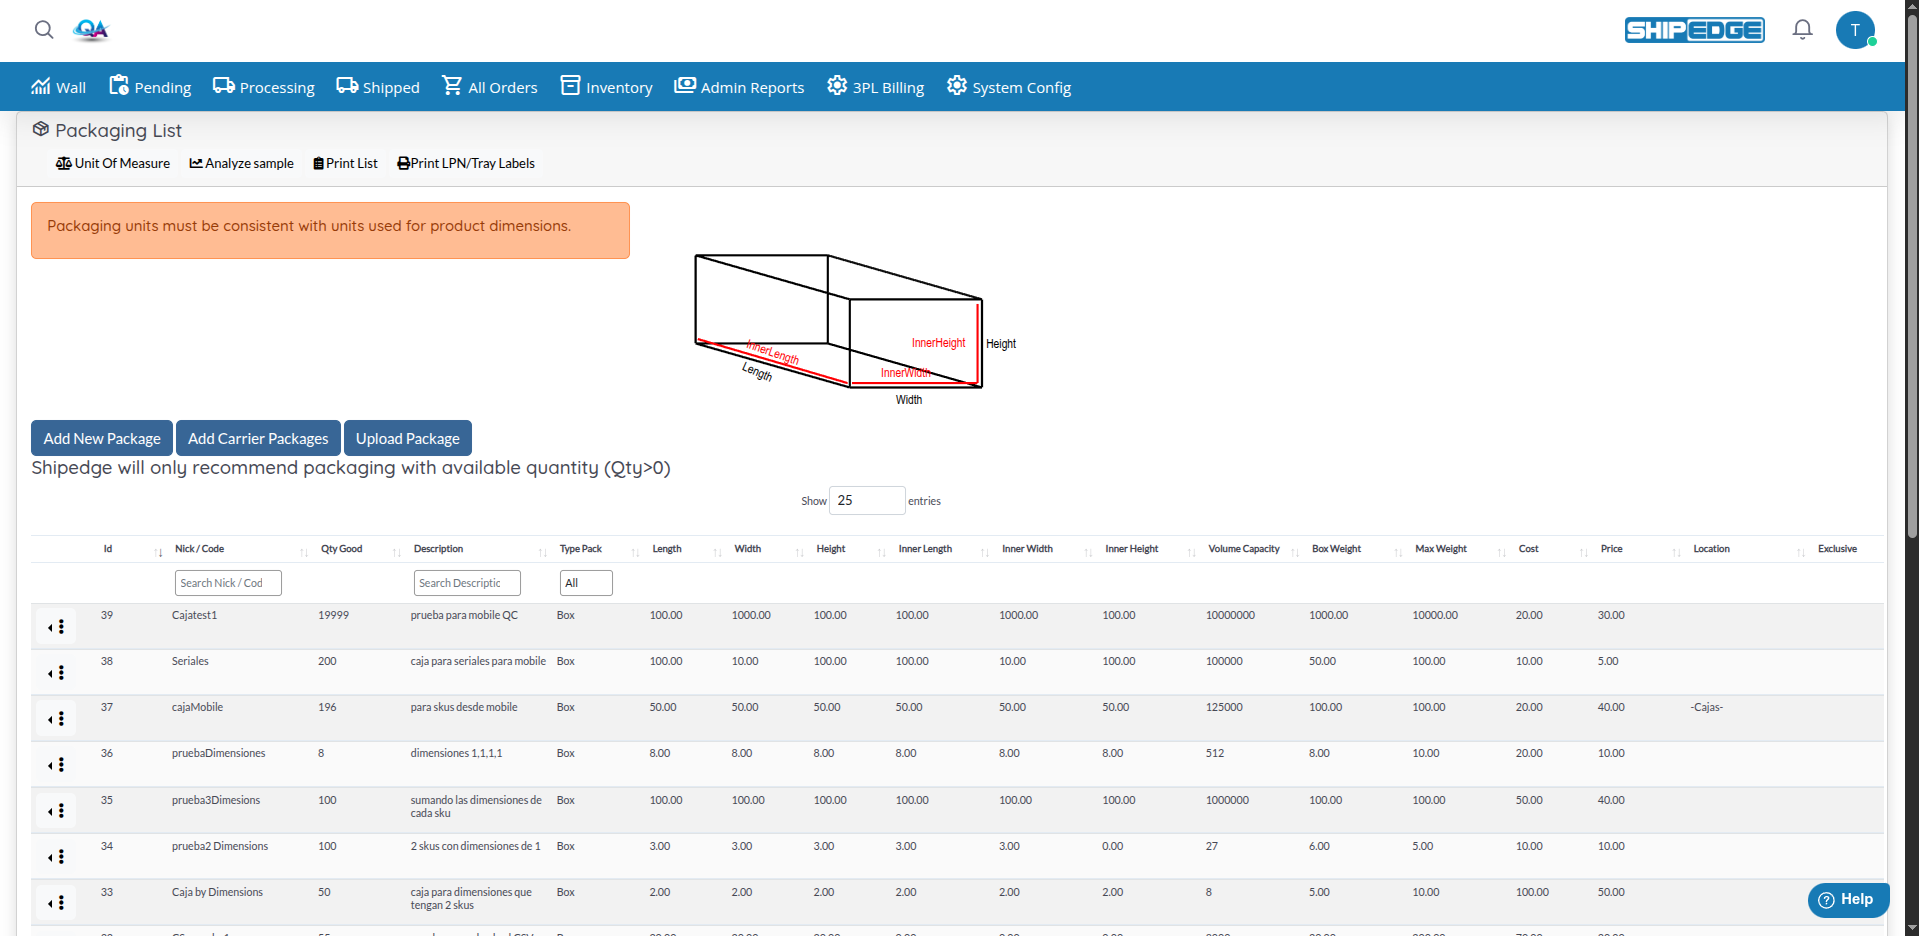
Packaging allows you to create and manage all packaging options available in your warehouse, including boxes, envelopes, and pallets. The system uses this information to automatically recommend the best packaging for each order based on product dimensions and weight.
The system automatically recommends the best packaging for each order based on product dimensions.
Configure packaging costs and prices to calculate and optimize shipping costs.
Track available quantity of each packaging type (Qty Good) to ensure availability.
Configure exclusive packaging for specific accounts or particular SKUs for special cases.
Supports different packaging types: Box, Envelope, Pallet, and No-Box according to your needs.
Import multiple packages from CSV for quick and efficient configuration.
You can access Packaging from:
Packaging supports four main packaging types:
Access Packaging
Go to Inventory > Packaging or access directly to the Packaging page.
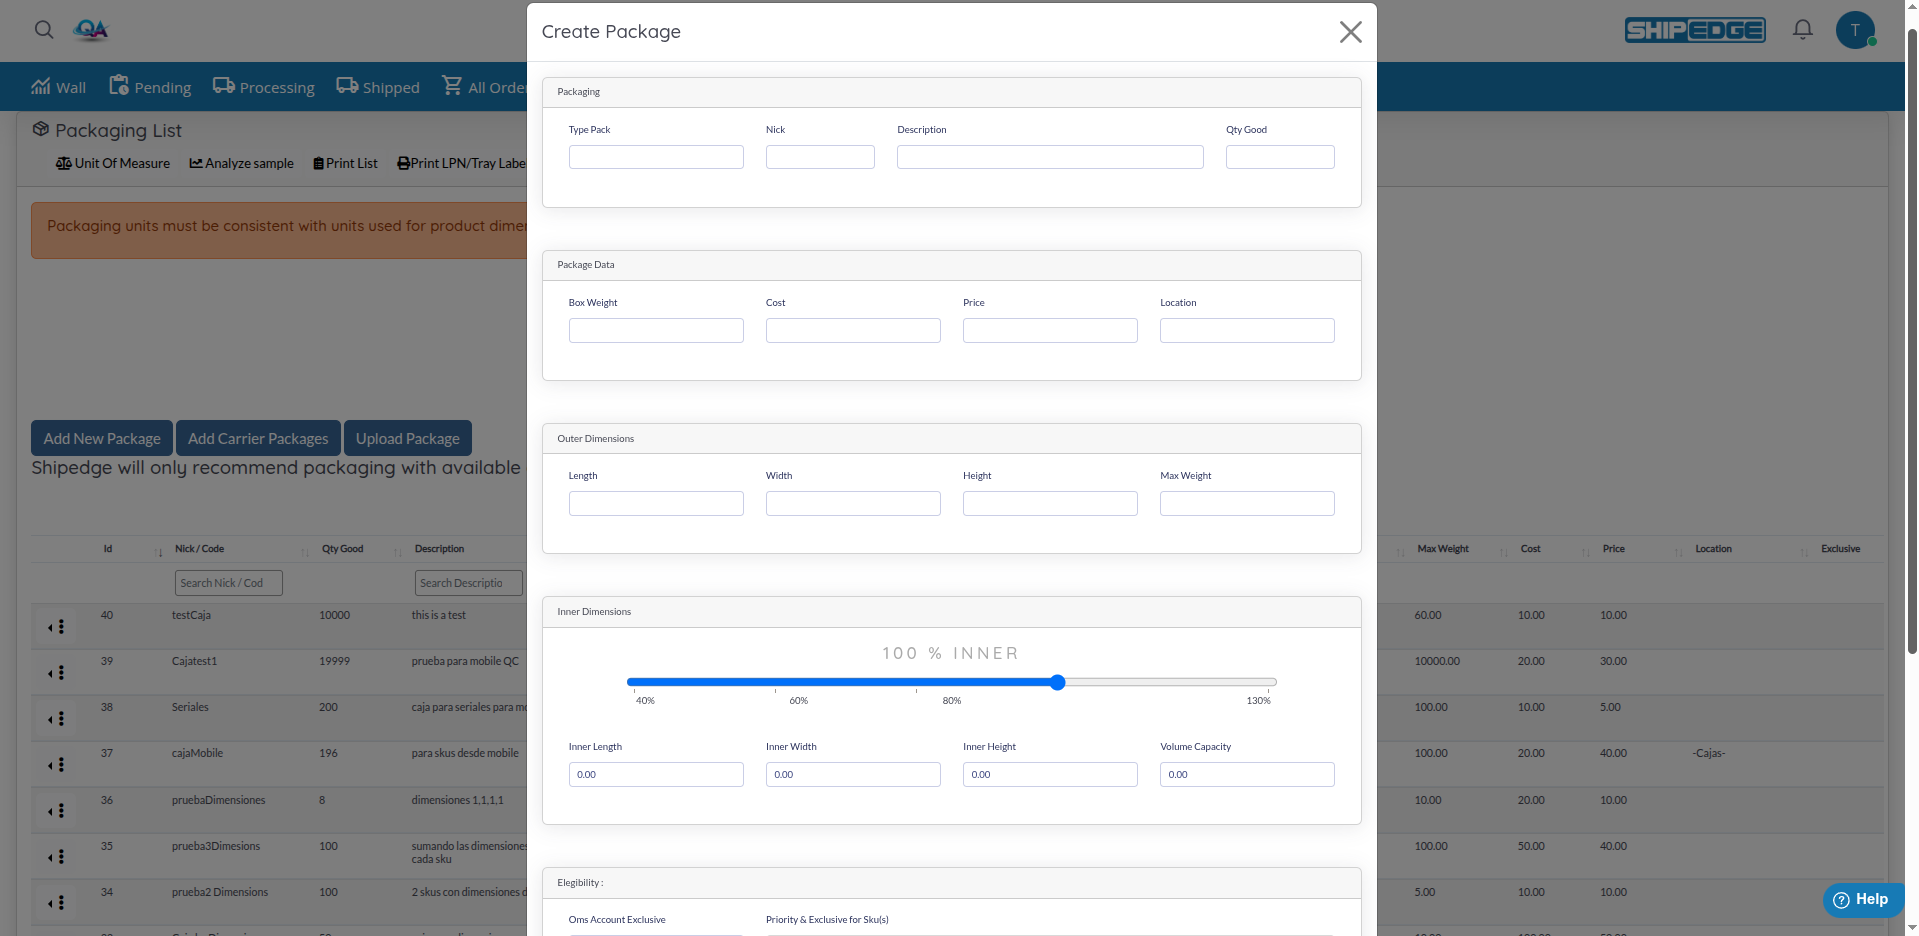
Click Add New Package
Above the table, click the Add New Package button.
Complete basic information
In the “Packaging” section, complete:
Configure package data
In the “Package Data” section, enter:
Define outer dimensions
In “Outer Dimensions”, enter:
Define inner dimensions
In “Inner Dimensions”, configure:
Configure eligibility (optional)
In “Elegibility”, you can configure:
Save the package
Click Create to create the new package.
Search for the package
In the Package List table, find the package you want to edit using the search filters in the column headers.
Open the menu
Click the menu button (three dots) at the start of the package row to open the dropdown.
Click Edit
Select Edit from the dropdown menu. The create/update modal opens with the package data loaded.
Modify fields
Update any field you need to change. All fields are editable.
Save changes
Click Update to save changes.
You can import multiple packages from a CSV file:
Download template
Click Upload Package and then Download template CSV to get the template.
Prepare your CSV file
Complete the CSV file with your package information. Make sure that:
Upload the file
Click Upload Package, select your CSV file, and click Upload.
Verify import
Review the Package List table to confirm packages were imported correctly.
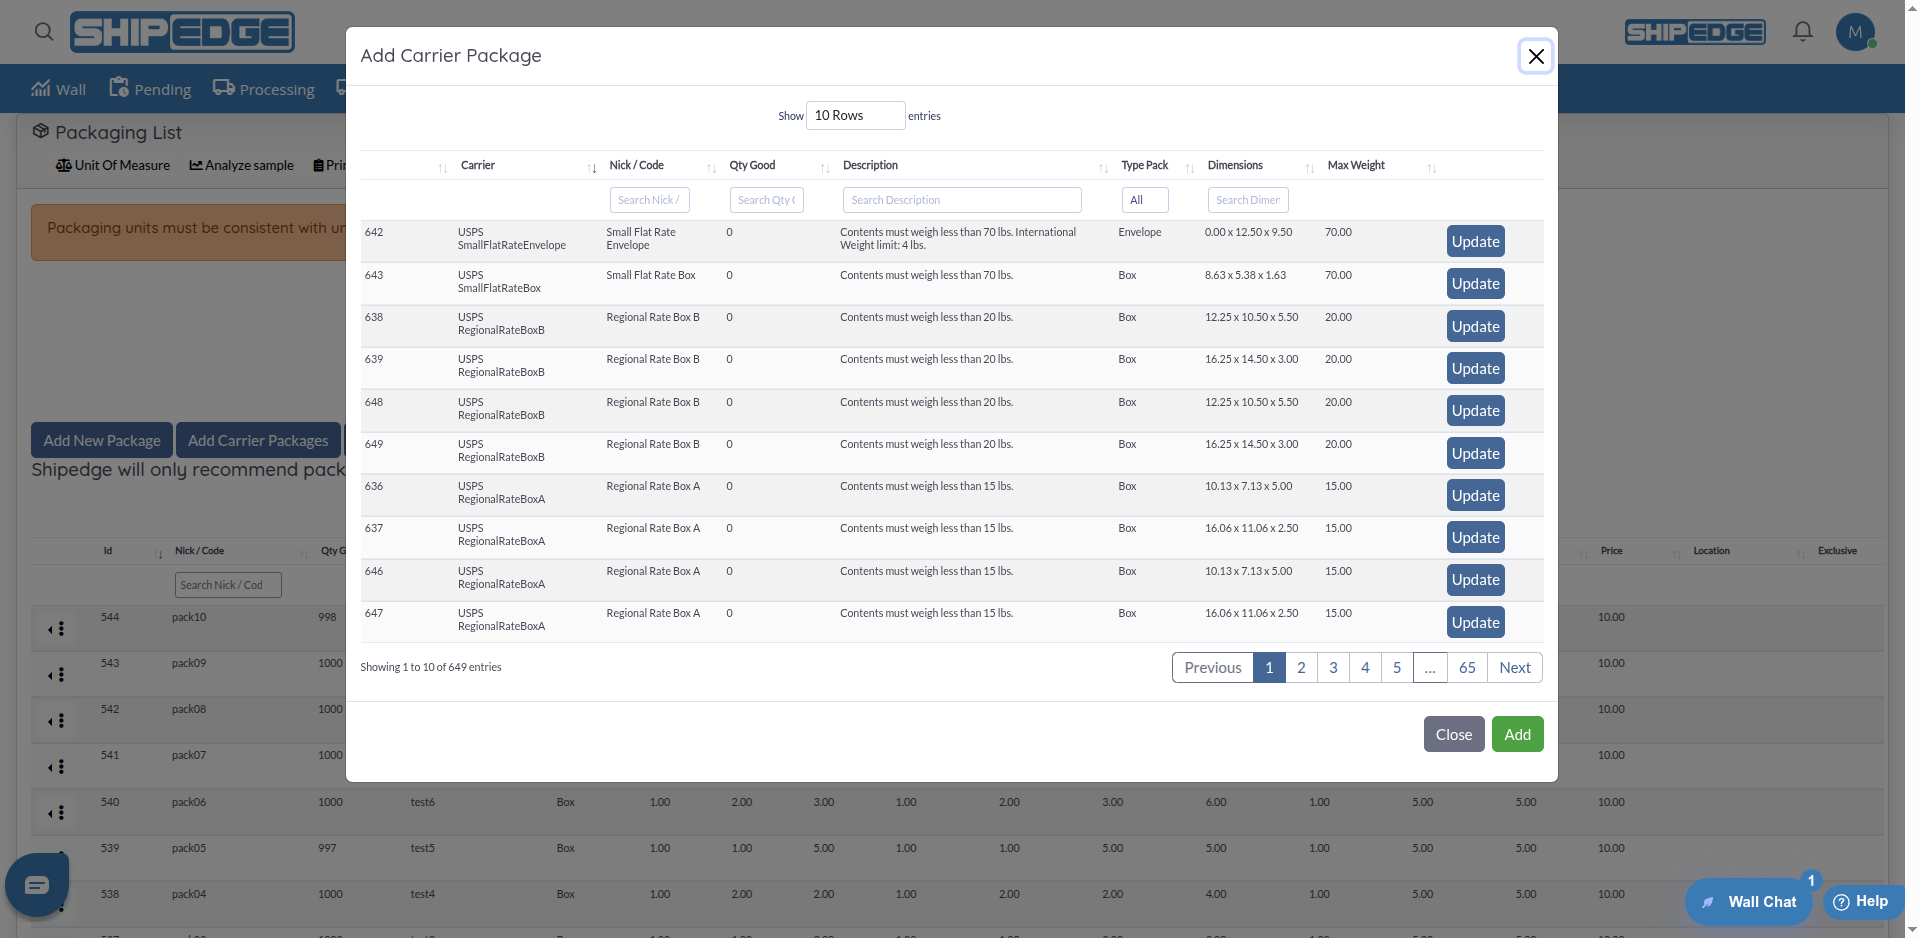
You can add packages directly from carrier catalogs:
Open Add Carrier Packages
Click the Add Carrier Packages button on the Package List page.
Select packages
In the modal, you’ll see a table of available carrier packages. Check the boxes next to the packages you want to add.
Add packages
Click Add to add the selected packages to your list.
Set quantity (optional)
After adding, you can click Edit on a carrier package row to open the “Update Qty Good” modal and set the available quantity (Qty Good).
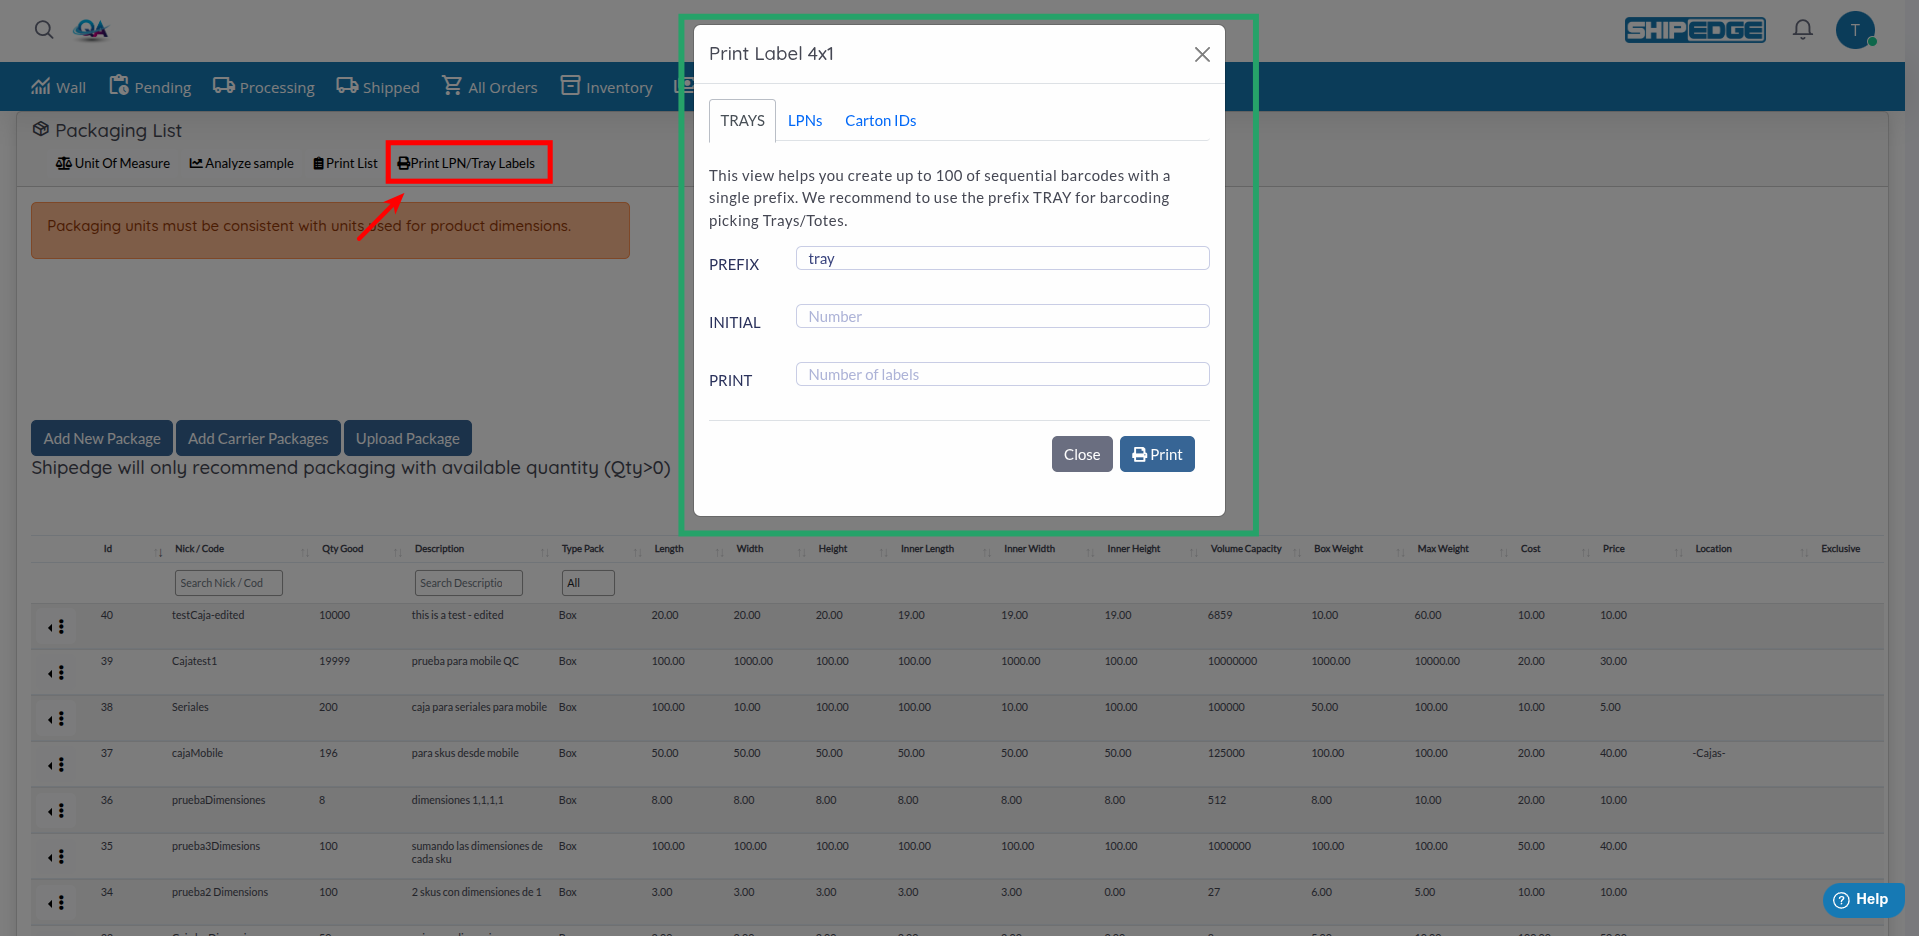
You can print labels for your packages:
Open Print LPN/Tray Labels
Click the Print LPN/Tray Labels button in the page header.
Choose label type
The modal has three tabs: TRAYS, LPNs, and Carton IDs. Select the tab for the type of labels you need.
Configure options
For TRAYS: Enter PREFIX (e.g., “tray”), INITIAL number, and number of labels to PRINT. For LPNs: Configure label size and other options. For Carton IDs: Follow the on-screen instructions.
Click Print to generate the labels.
You can analyze how sample products fit in your packages:
Open Analyze sample
Click the Analyze sample button in the page header (next to Unit Of Measure, Print List, and Print LPN/Tray Labels).
Enter product information
Provide dimensions and weight of the product you want to analyze.
Review recommendations
The system shows which packages are suitable for that product and why.
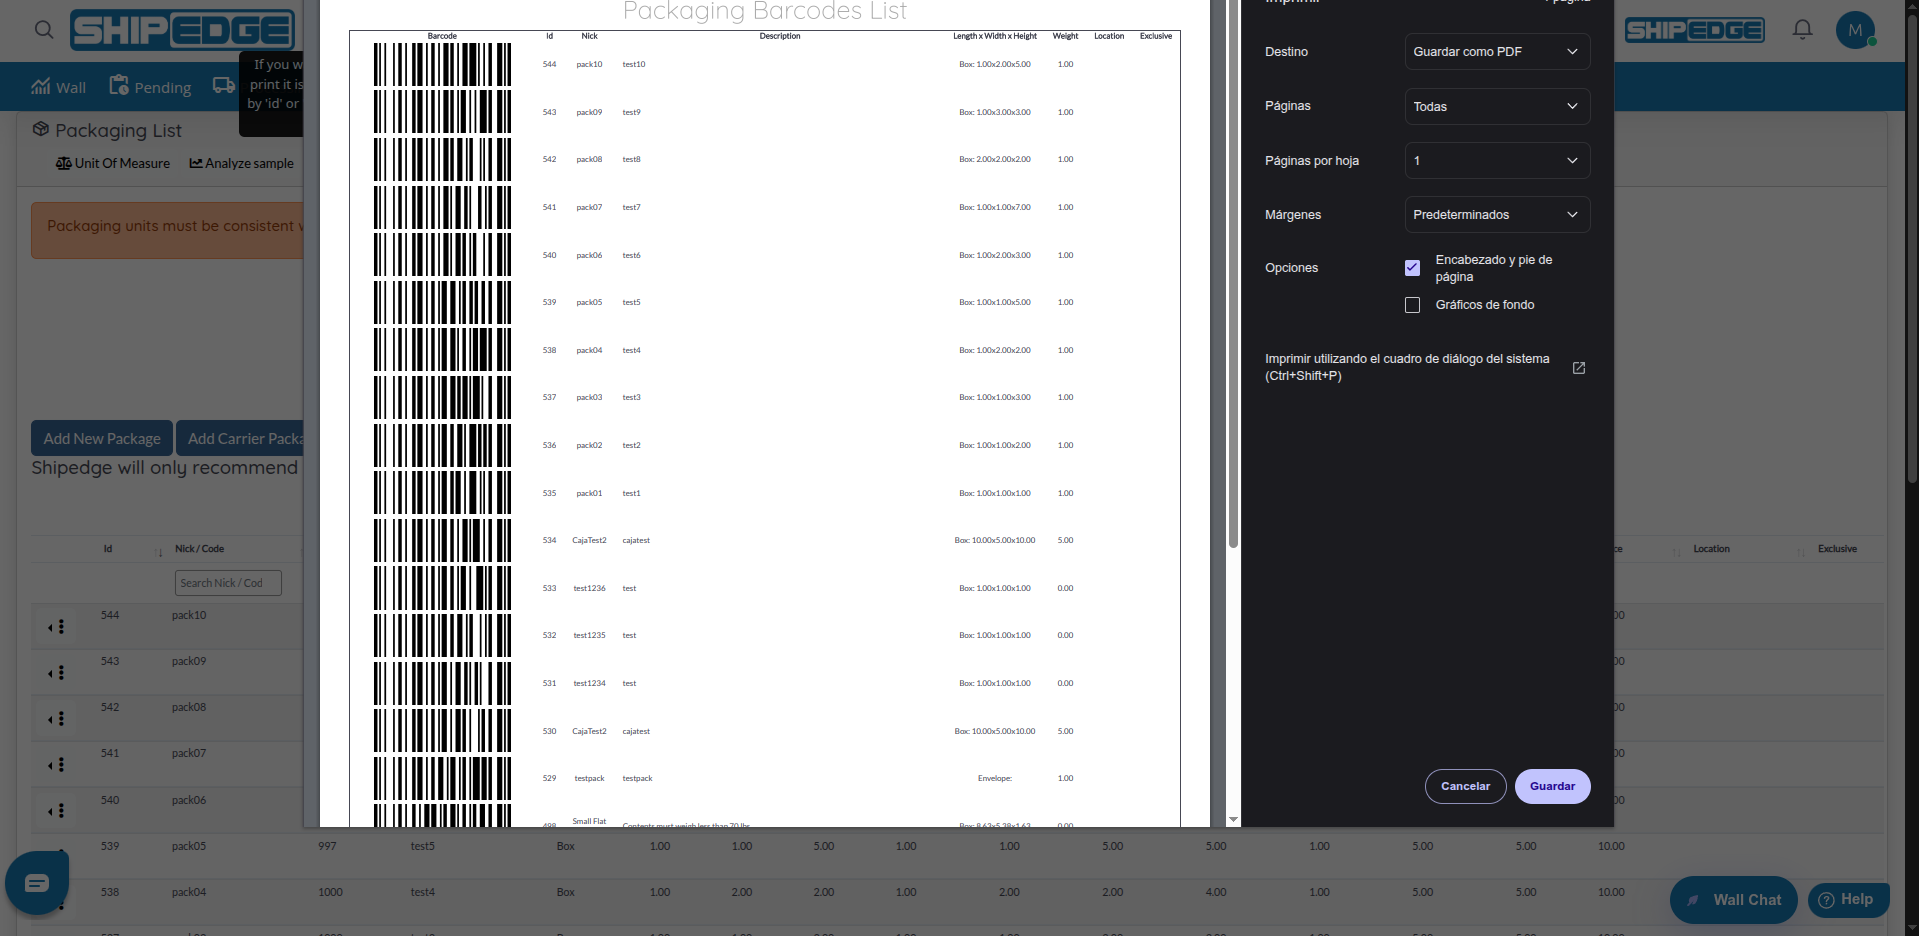
You can print a complete list of all your packages:
Sort table (optional)
For a personalized print, sort the table by Id or Nick / Code before printing.
Click Print List
Click the Print List button in the page header.
A print preview opens. Use your browser’s print function to print the list.
Regularly update the “Qty Good” field so the system only recommends available packages.
Enter exact dimensions for both outer and inner. This improves accuracy of automatic recommendations.
Always configure “Max Weight” to avoid overloading packages and problems with carriers.
Configure exclusive packages only when necessary. Too many restrictions can limit packaging options.
Inner percentage (% Inner) affects how the system calculates available space. Adjust according to package type.
To create many packages, use CSV import instead of creating them one by one. It’s much more efficient.
Use codes or names (Nick) that are easy to identify and remember to facilitate daily management.
Complete Cost and Price fields for accurate shipping cost calculations and billing.
Problem: The CSV file doesn’t import correctly or shows errors.
Solution:
Problem: Inner dimensions don’t calculate automatically when changing the percentage.
Solution:
Problem: I can’t find or select SKUs for exclusivity.
Solution:
Problem: A configured package doesn’t appear when processing an order.
Solution: