Accept Credit Card Payments
Enable OMS clients to pay their invoices with credit cards. Payments are processed securely through Stripe.
Esta página aún no está disponible en tu idioma.
Stripe Configuration lets you connect your WMS to Stripe Connect so you can accept credit card payments from OMS clients. This page guides you through the setup process and shows the current status of your Stripe account.
You must complete Stripe Connect setup before OMS clients can pay their invoices with credit cards. The page shows different status messages depending on whether your account is configured, active, or still needs setup.
Stripe Configuration is a setup page that connects your warehouse (WMS) to Stripe Connect. Stripe Connect is the payment gateway that processes credit card payments from your OMS clients when they pay their 3PL billing invoices.
The page checks your gateway settings and shows whether the connection is active, incomplete, or not configured. You can start the setup, complete the onboarding process, or refresh the status from this page.
Enable OMS clients to pay their invoices with credit cards. Payments are processed securely through Stripe.
Complete the Stripe Connect setup in a popup window. The system guides you through each step.
Use Test Mode for sandbox testing or Production Mode for real payments. The mode is set in your gateway configuration.
See at a glance whether your account is active, setup is incomplete, or configuration is missing.
You can access Stripe Configuration from:
The page shows one of four status messages depending on your Stripe Connect account state:
Your account is active and ready to process payments. The page shows a Current Mode badge (Test Mode or Production Mode). You see:
Your Stripe Connect account exists but onboarding is not finished. You see:
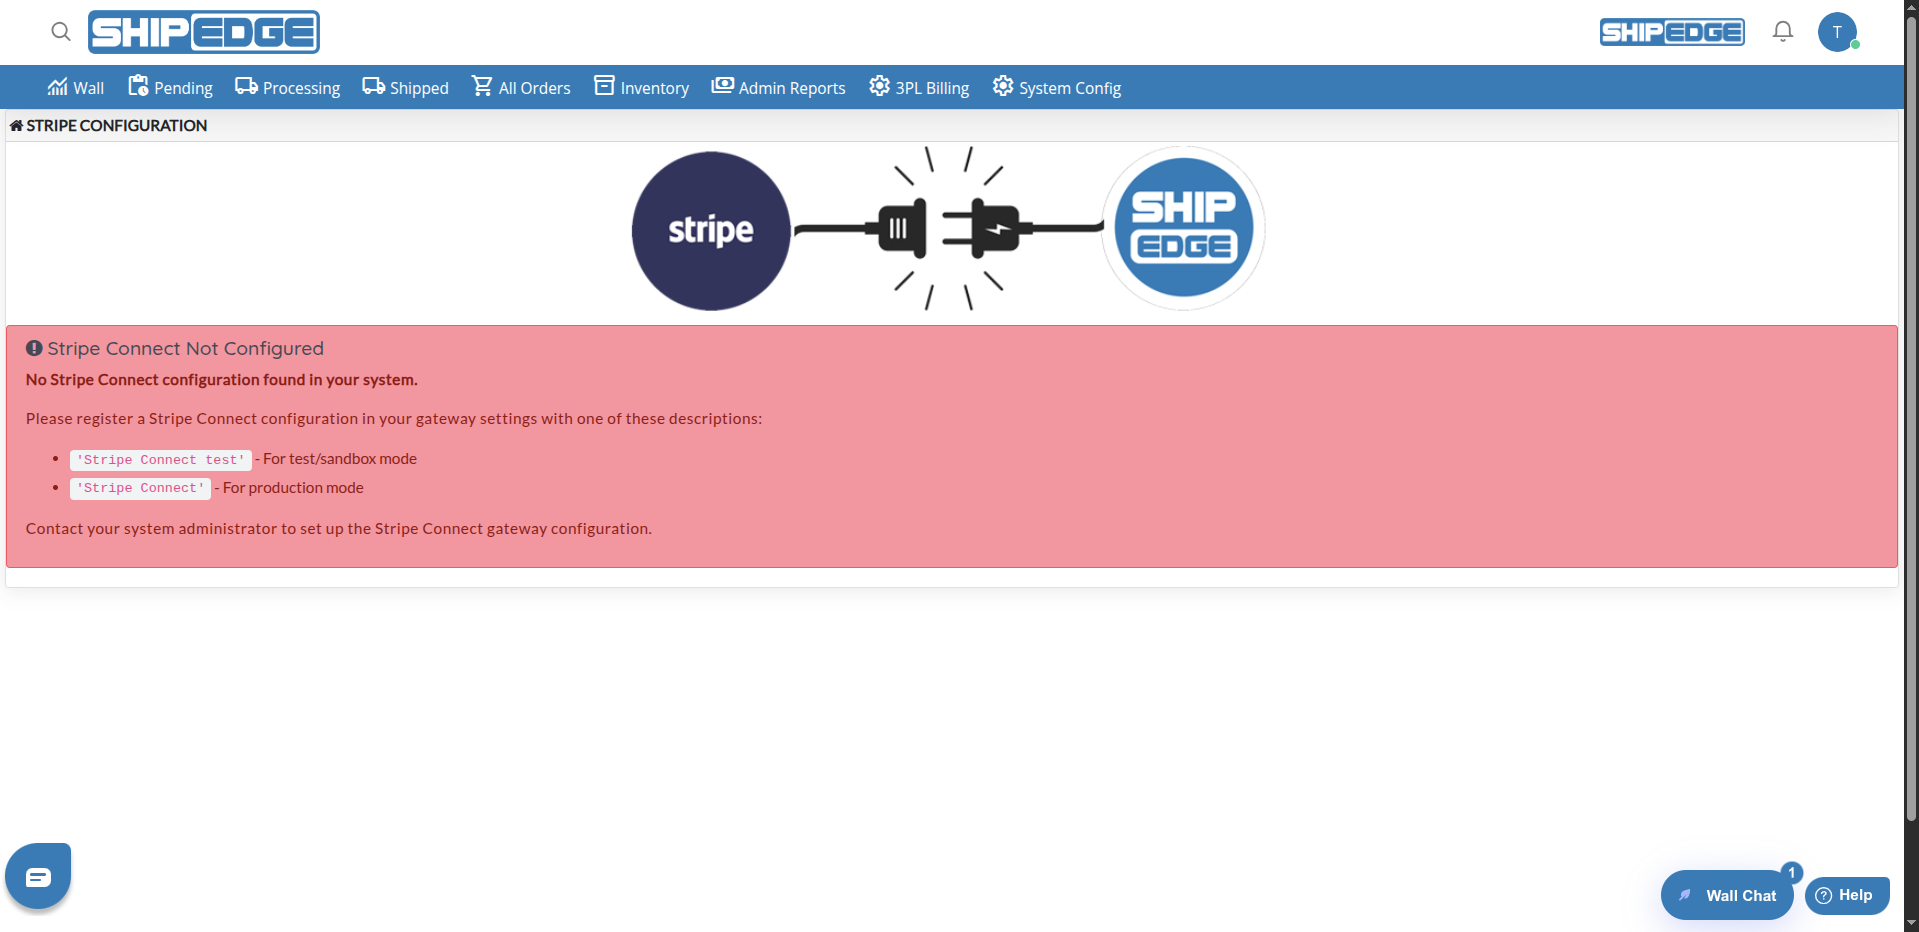
No Stripe Connect configuration exists in your system. The page explains that your administrator must register a Stripe Connect gateway configuration with one of these descriptions:
Stripe Connect test – For test/sandbox modeStripe Connect – For production modeContact your system administrator to set up the gateway configuration.
The gateway is configured but no Stripe account is connected yet. You see:
Go to Stripe Configuration
Go to 3PL Billing → Stripe Configuration in the WMS menu. The page title shows STRIPE CONFIGURATION.
Click Connect with Stripe
Click the Connect with Stripe button. A popup window opens with the Stripe onboarding form.
Complete the setup in the popup
Fill in the required information in the Stripe window. When you finish, the popup closes automatically or you can close it manually.
Return to the page
The page refreshes and shows your status. If setup is complete, you see a green success message: “Stripe Connect setup has been completed successfully! Your account is now ready for processing payments.” The status area shows “Stripe Connect Configured” in green.
| Button | When Shown | Action |
|---|---|---|
| Connect with Stripe | Not configured | Starts the connection and opens Stripe onboarding |
| Complete Setup | Setup incomplete | Opens Stripe onboarding to finish the process |
| Check Status | Account active | Reloads the page to verify status |
| Reconfigure Account | Account active | Asks for confirmation; shows “Reconfiguration feature coming soon. Please contact support if you need to change your account.” |
| Refresh Status / Refresh Page | Various | Reloads the page to update the display |
The mode is determined by the gateway configuration in your system:
Stripe Connect test in the gateway settings. Use this for testing without real charges.Stripe Connect in the gateway settings. Use this for live payments.The current mode appears as a badge on the page when the gateway is configured.
Complete setup in Test Mode before switching to Production. This helps you verify the flow without real charges.
Enable popups for the WMS site so the Stripe onboarding window can open. If blocked, use the “Open in New Tab” option.
Finish all steps in the Stripe onboarding. Incomplete setup can leave your account in “Setup Incomplete” status.
After completing setup, return to the page and click Refresh Status to confirm your account is active.
Problem: The Stripe setup popup does not open.
Solution: An alert appears: “Your browser blocked the Stripe setup popup. You can:” with three buttons. Click Open in New Tab to open in a new tab, Continue in This Window to use the same window, or Cancel Setup to stop. You can also allow popups for the WMS site in your browser settings.
Problem: You see an error message at the top of the page (for example, from ?error= in the URL).
Solution: Read the error text. It may indicate an issue with the Stripe API or your session. Try refreshing the page and starting the setup again. If the error persists, contact support.
Problem: You finished setup in Stripe but the page still shows “Setup Incomplete”.
Solution: Click Refresh Page or Refresh Status to reload the page. The system checks Stripe again and updates the display. If it still shows incomplete, wait a few minutes and try again.
Problem: The page shows “Stripe Connect Not Configured” in red.
Solution: Your system administrator must add a Stripe Connect gateway configuration. The gateway must use the description Stripe Connect test (for test mode) or Stripe Connect (for production). Contact your administrator for help.
Next Steps: